Getting Started with Quick Receivable
This guide walks a new Salesforce admin through installing Quick Receivable, connecting your ERP or accounting system, and reviewing your first synced accounts and invoices. Plan for a few hours of initial setup, plus time to configure dunning templates and collector assignments that match your AR process.
Before you start: you'll need Salesforce System Administrator access to your org, since installing a managed package and assigning permission sets both require admin rights.
What You'll Need
- A Salesforce org (Production or Sandbox) with System Administrator access.
- A list of the people who will use Quick Receivable, and what role each one plays. Quick Receivable is used by Collectors who work accounts day to day, and AR Admins who configure dunning, credit, and reporting.
- Read access to your ERP or accounting system (such as SAP or another financial system) if you plan to sync accounts, invoices, and payments automatically.
- An Equifax account or existing credit bureau relationship, if you plan to use Credit Risk Scoring.
Step 1: Install the Quick Receivable Managed Package
- Your Quick Receivable implementation contact will provide a package installation link for your org.
Example:
https://login.salesforce.com/packaging/installPackage.apexp?p0=xxxxxxxxxxxxxxxxxxReplace the Salesforce domain in the URL with your org's login URL, keeping
/packaging/installPackage.apexp?p0=xxxxxxxxxxxxxxxxxxunchanged. - Open the link while logged into the Salesforce org where you want to install, and choose whether to install in Production or a Sandbox first. We recommend testing in a Sandbox before installing in Production if this is your first Quick Receivable installation.
- When prompted, choose Install for Admins Only so you control access before anyone else logs in.
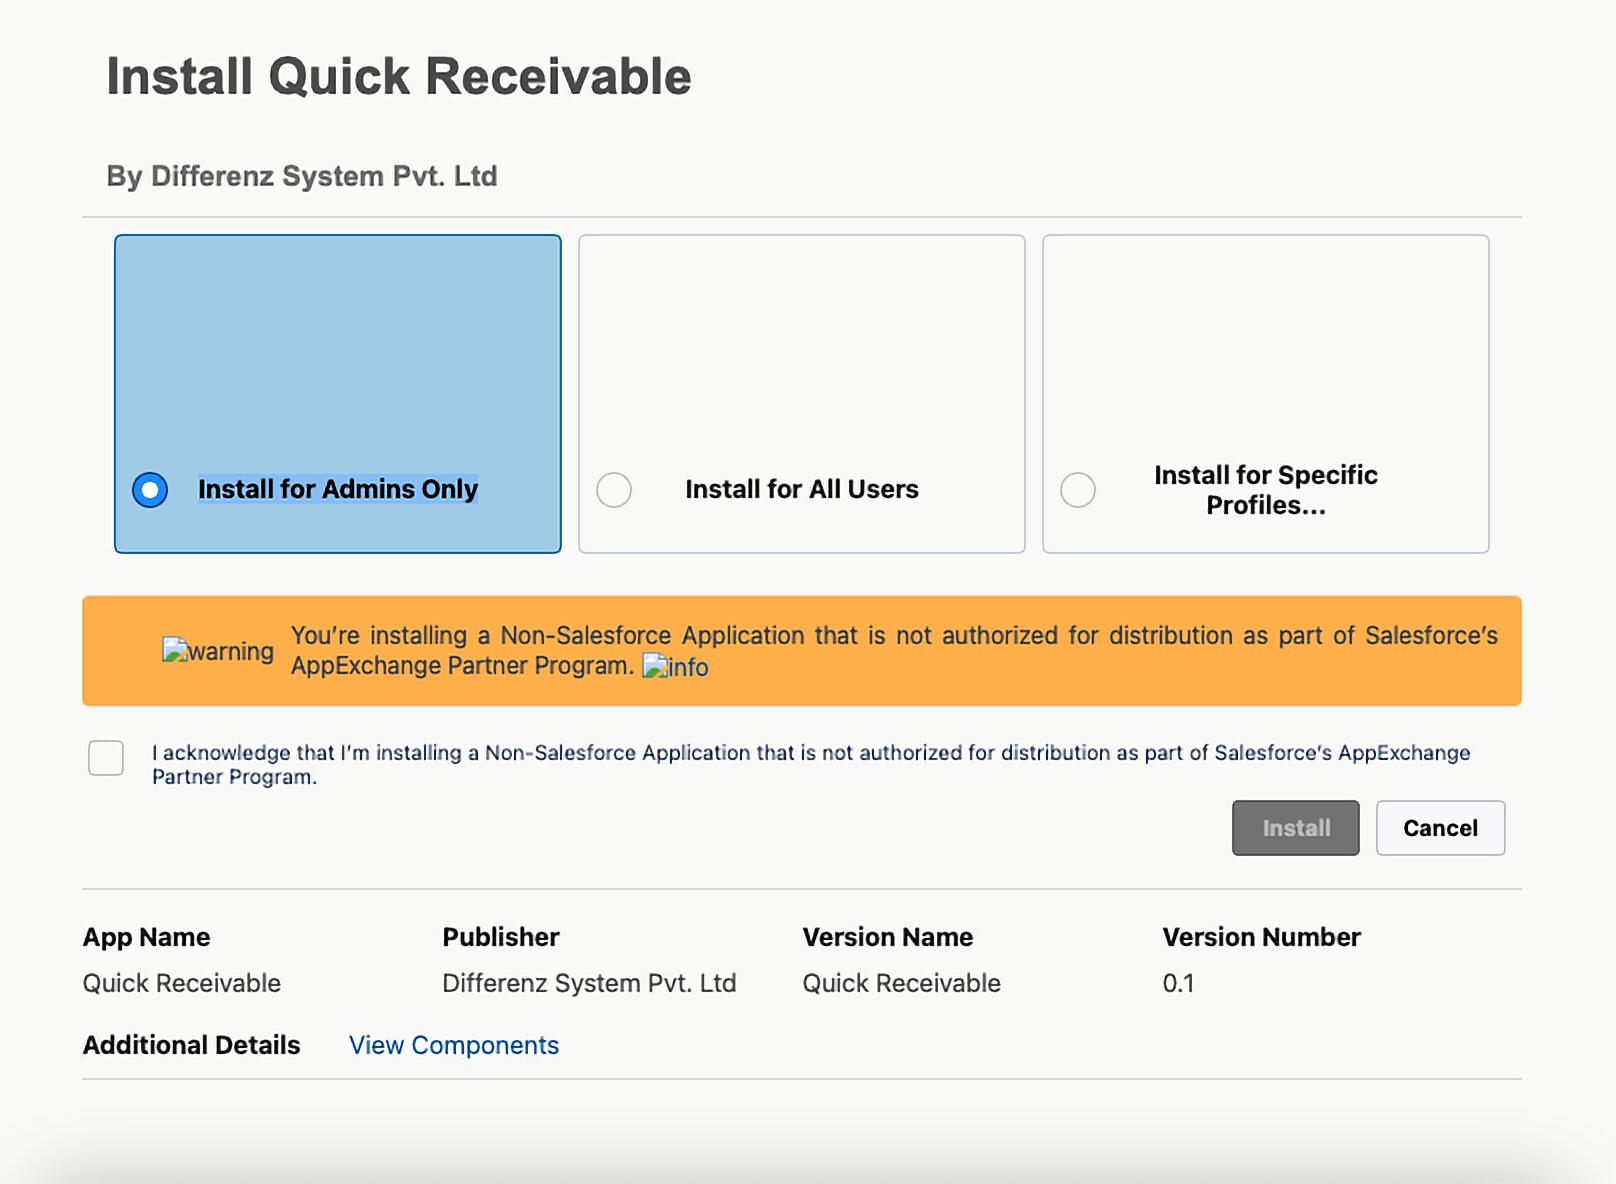
- Approve access to any trusted third-party services Quick Receivable requires, then confirm the install.
- Wait for the installation confirmation email from Salesforce before continuing. Package installation can take a few minutes.
Step 2: Assign Permission Sets and Licenses
- In Setup, go to Permission Sets and confirm the Quick Receivable permission sets installed with the package.

- Assign the QR Permission Set to whoever will configure dunning templates, credit policy, and reporting.

- Confirm each assigned user has an active Salesforce license, since permission sets alone don't grant access without one.
Step 3: Connect Your ERP or Accounting System
- Gather the credentials or connected app details your ERP or accounting system requires (SAP and other systems are supported).
- Follow the setup steps in Integrations to configure the connection and set your sync schedule.
- Run an initial sync and confirm customer accounts, open invoices, and recent payments appear correctly in Quick Receivable.
- If you're not ready to connect an ERP yet, you can bring in accounts and invoices manually or by import, and connect a system later.
Step 4: Review Your First Synced Accounts and Invoices
- Open the All Accounts list to see every customer account rolled into one sortable table.
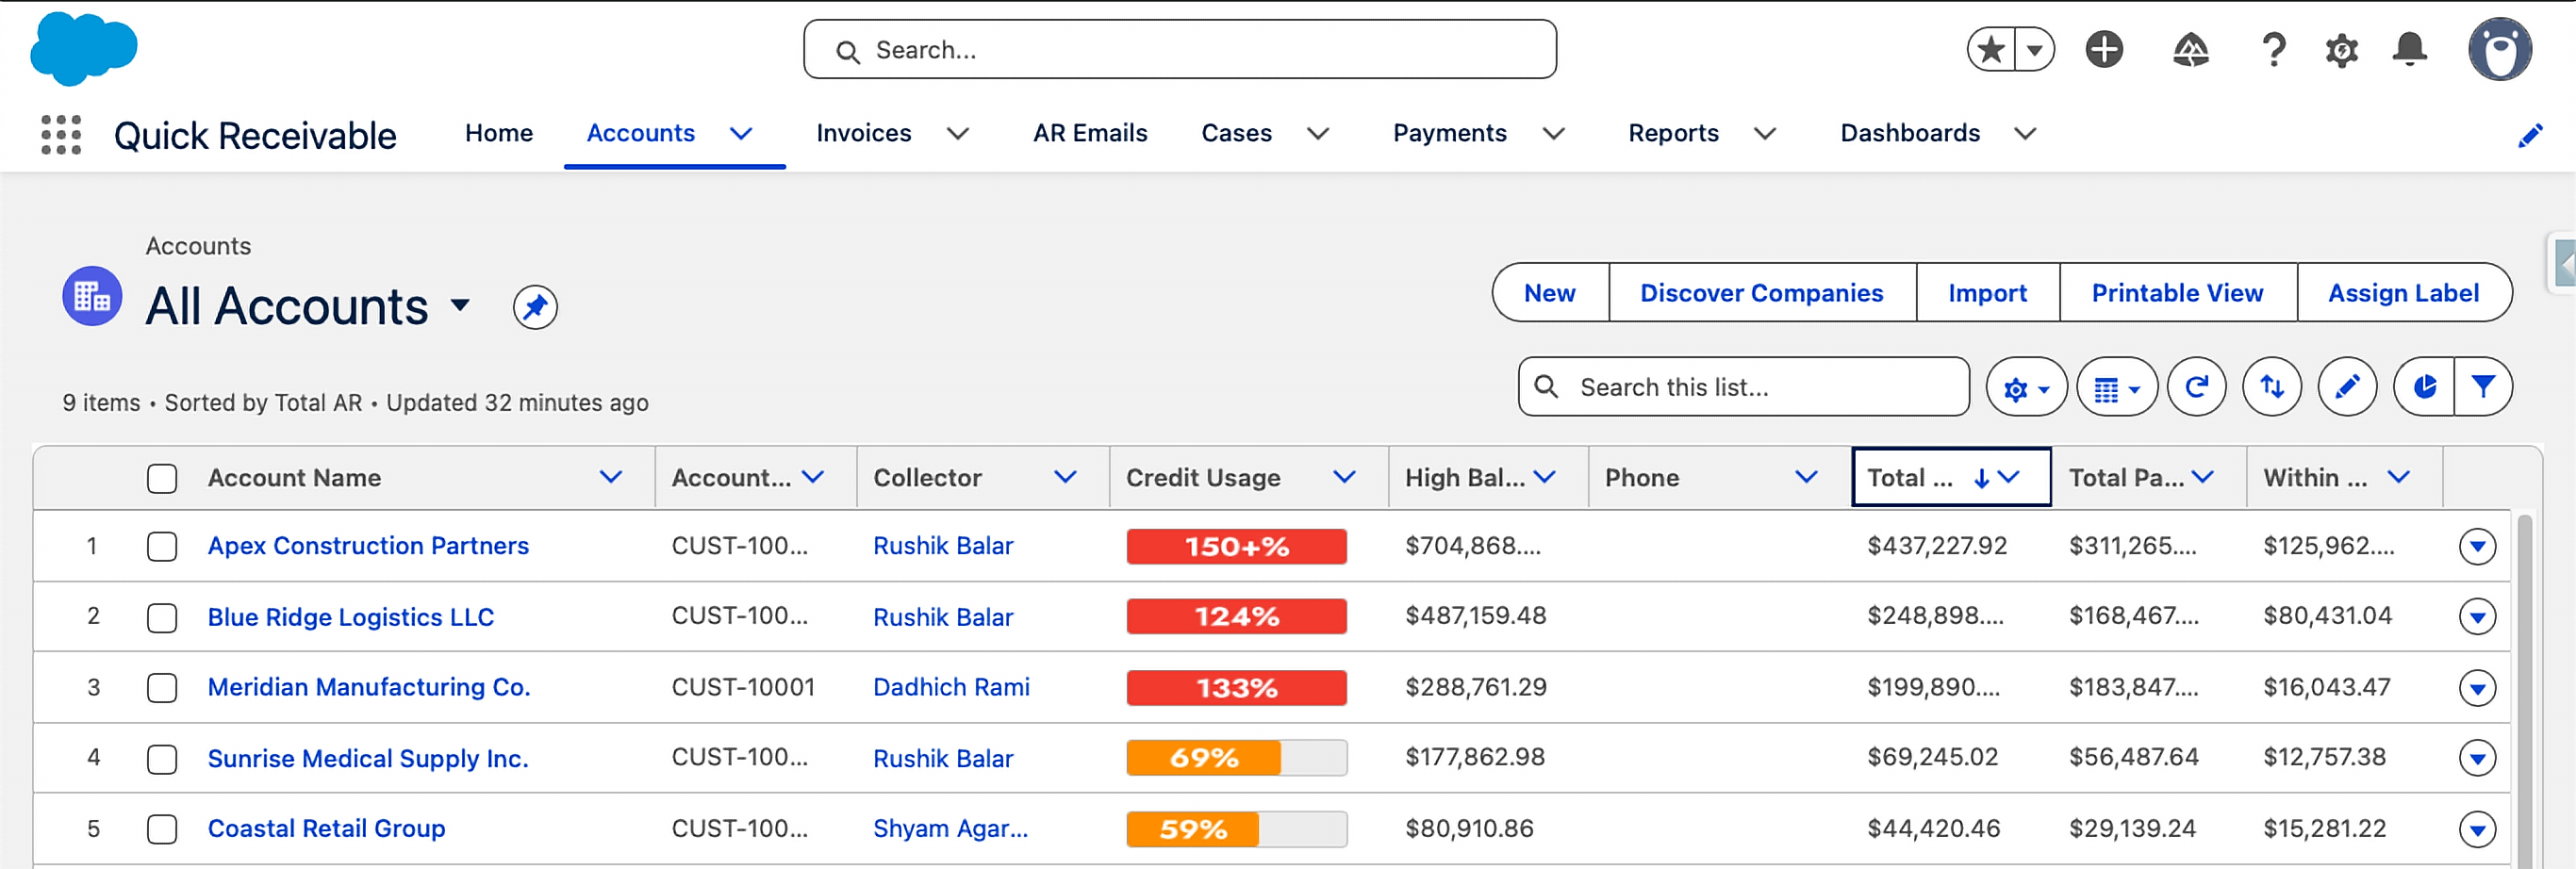
- Confirm aging balances are grouped correctly into 30, 60, 90, and 120+ day buckets.
- Open a single account and confirm Total AR, Total Past Due, and related invoices look correct against your source system.
Step 5: Assign Collectors to Accounts
- Open an account record and assign a named Collector so ownership is clear.

- Repeat for your highest-priority accounts first. You can assign the rest in bulk once you're comfortable with the process.
- See Administration for bulk collector assignment options.
Step 6: Configure Your First Dunning Templates
- Review the standard reminder cycle: Early reminder, Due reminder, Past-due reminder, Final notice, and Broken-promise follow-up.
- Adjust the wording and timing of each template to match your organization's tone and collection cadence.
- See Collections & Dunning for the full template list and setup detail.
Step 7: Turn On AI Features (Optional)
- Enable the AI Draft Engine so your team can generate customer emails from account and invoice data.
- Enable Email Classification so incoming AR emails are automatically categorized and routed to the right follow-up action.
- Review AI Insight priority scoring so accounts are automatically ranked for your team to work.
- See Features for the full set of AI-powered tools and how to configure each one.
What's Next
Once your accounts are synced and your first dunning templates are configured, these are good next steps:
- Collections & Dunning: build out your full reminder cycle and promise-to-pay tracking.
- Administration: manage users, collector assignments, and roles as your team grows.
- User Guide: day-to-day instructions for Collectors and AR Admins.
- Integrations: connect your ERP or accounting system if you haven't yet.
- Troubleshooting: common setup issues and how to resolve them.
Need help with setup?
Every Quick Receivable customer gets guided onboarding support. Reach us at info@quickreceivable.com or through our Contact Us page, or book a free demo if you'd like a walkthrough before you begin.